Anamorphic Darkroom Printing
Have a look at the post where I shot this picture first for some more background.
Have a look at this picture.
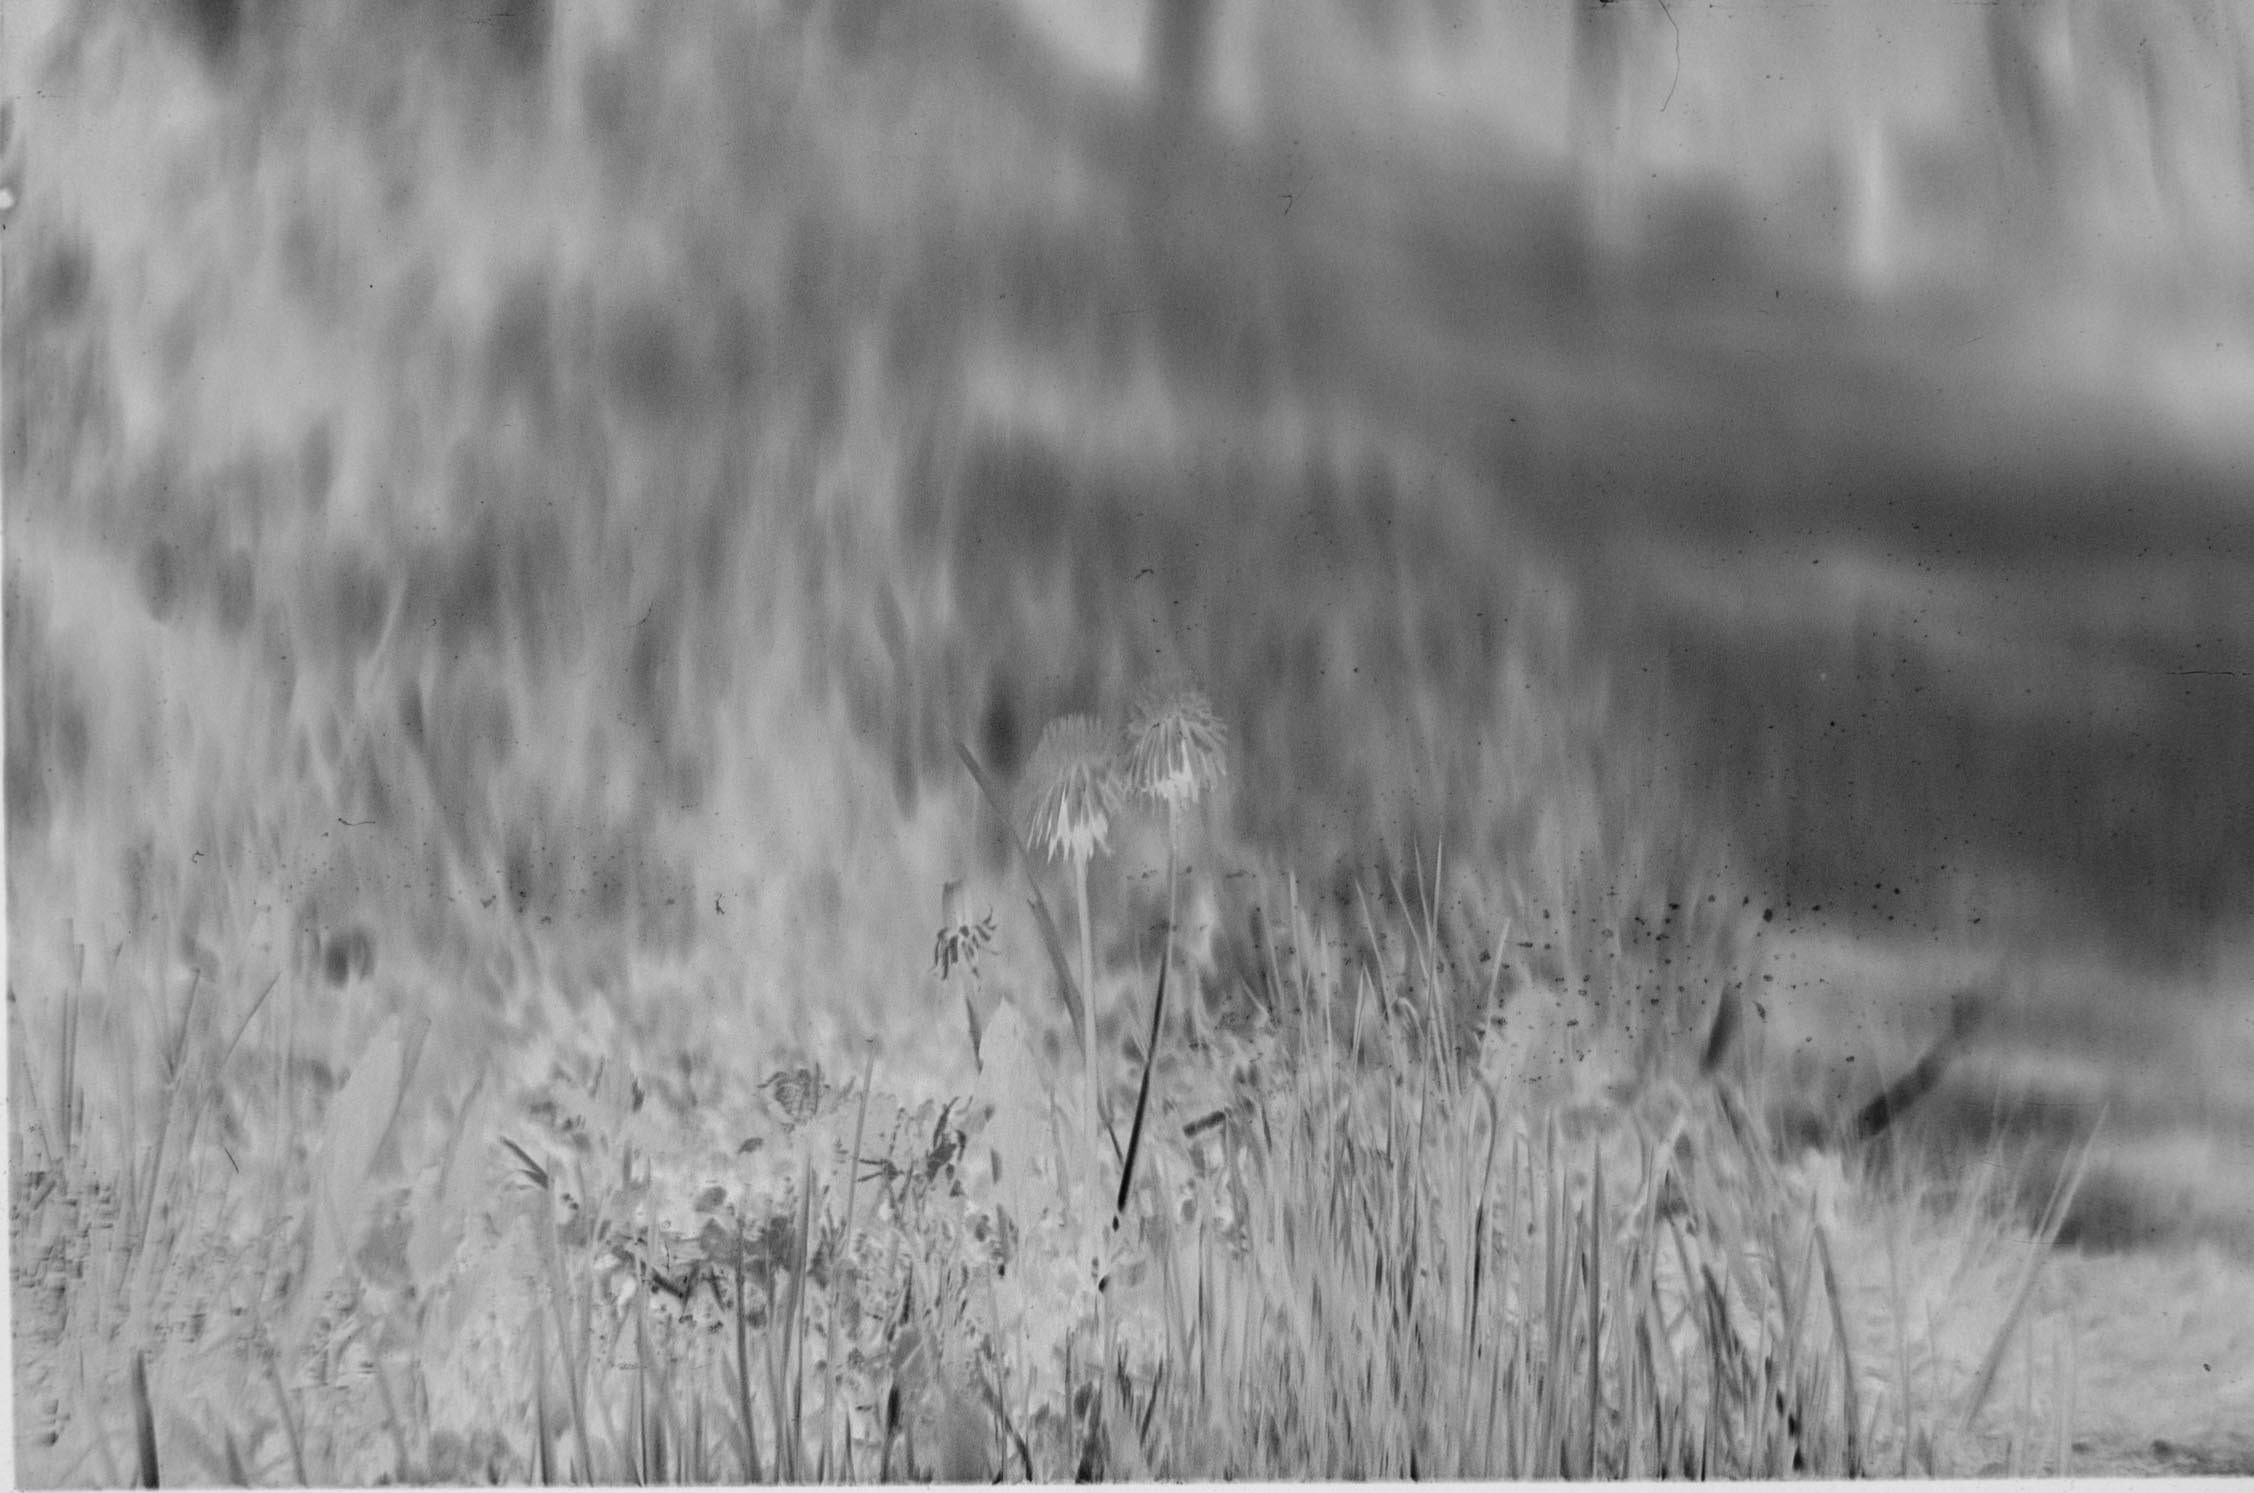
Notice anything wrong?
.. it’s a negative.
But, not only is it a negative- it’s an anamorphic negative. And, enlargers are only meant to deal with negatives.. So, how to still get a print from this that looks normal?
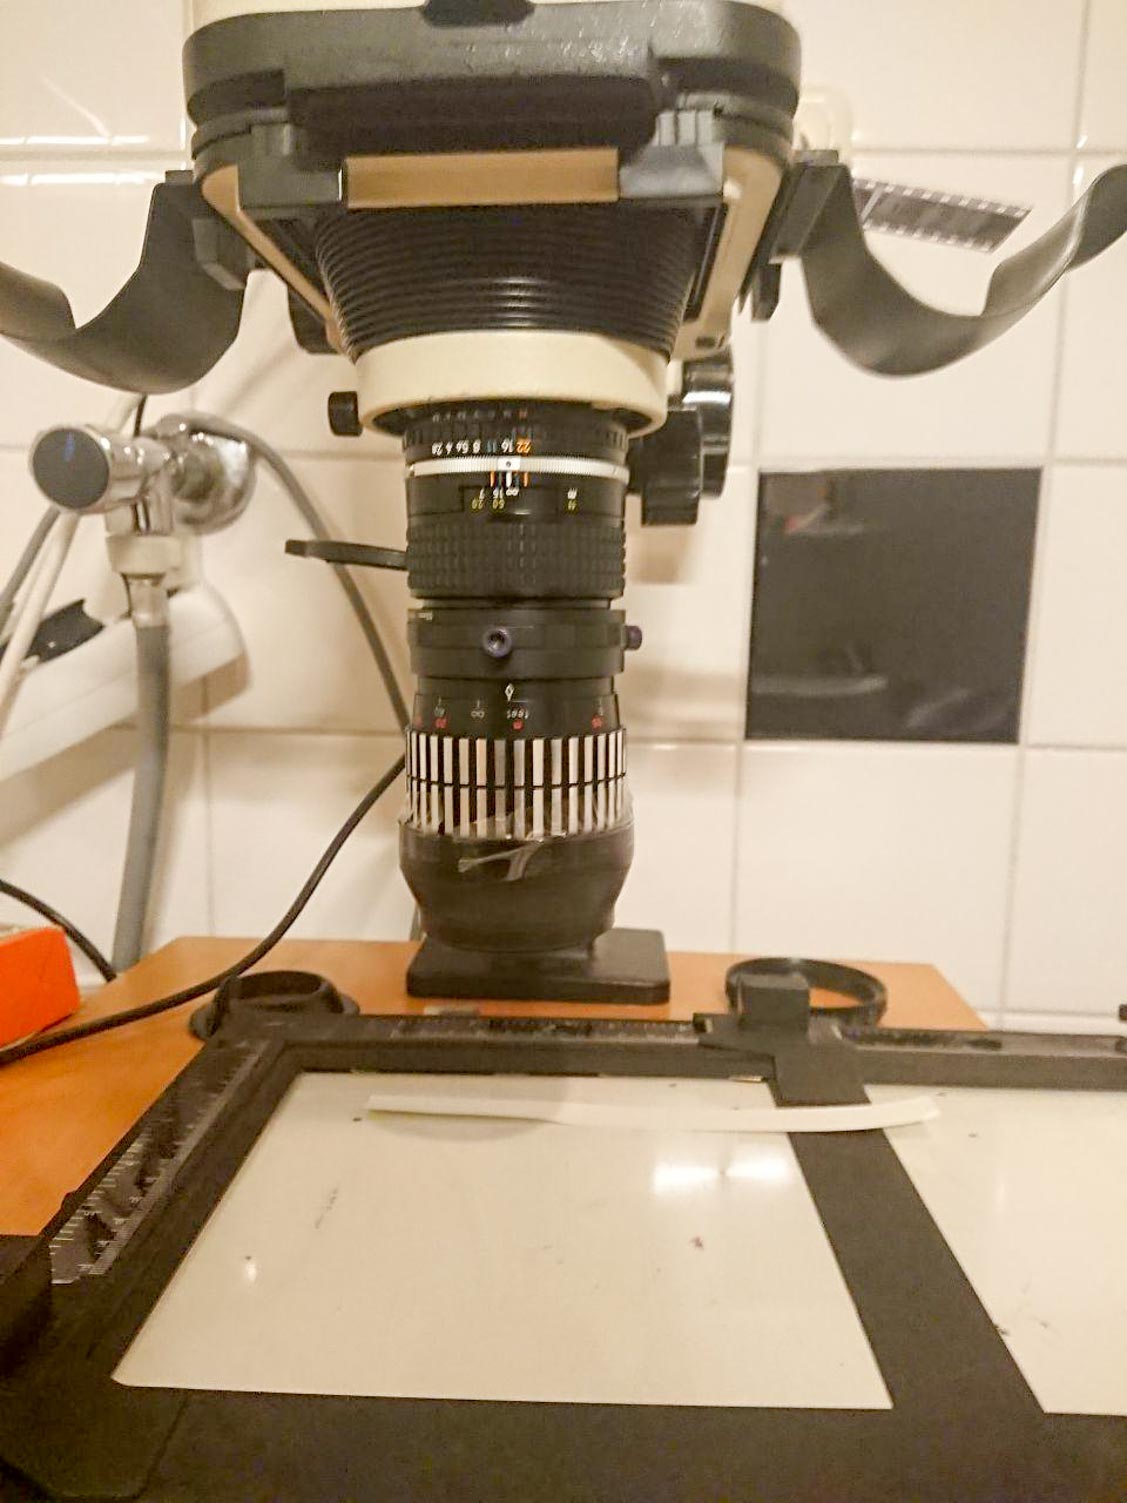
The answer here comes in the reversibility of optics. If we just attach the anamorphic lens again to the enlarger, it will stretch out the picture. (also, any weird uneven stretching, sometimes known as “anamorphic mumps” should disappear since it’s stretched by the same thing that squeezed it during recording!)
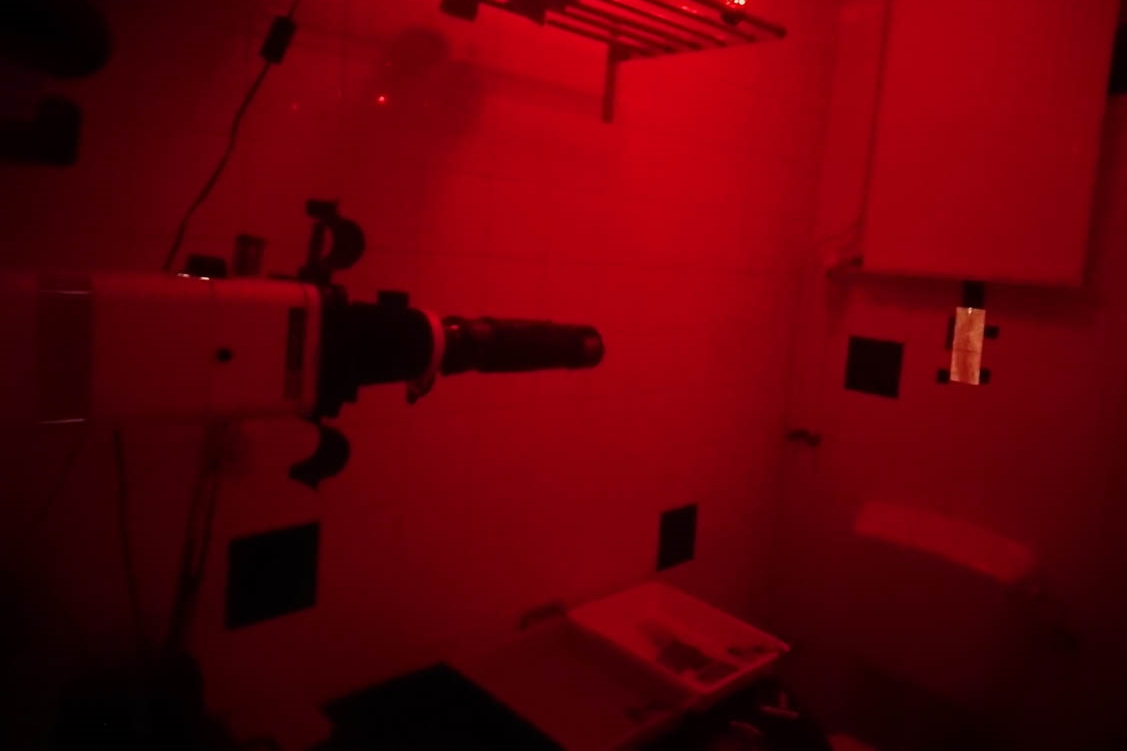
However, the enlarger is not made to mount other lenses to it, nor is the anamorphic lens meant to focus at close distances.
The first step then, was to design and 3d-print a Meopta-enlarger to Nikon F mount. Using this, I can now mount any! Nikon F lenses to these enlargers. If I then mount the same 100mm lens I used to take the photo, then the anamorphic lens, I should be able to get a nice image out of it.
The image that it produces is
-quite sharp and detailed
-very small!!
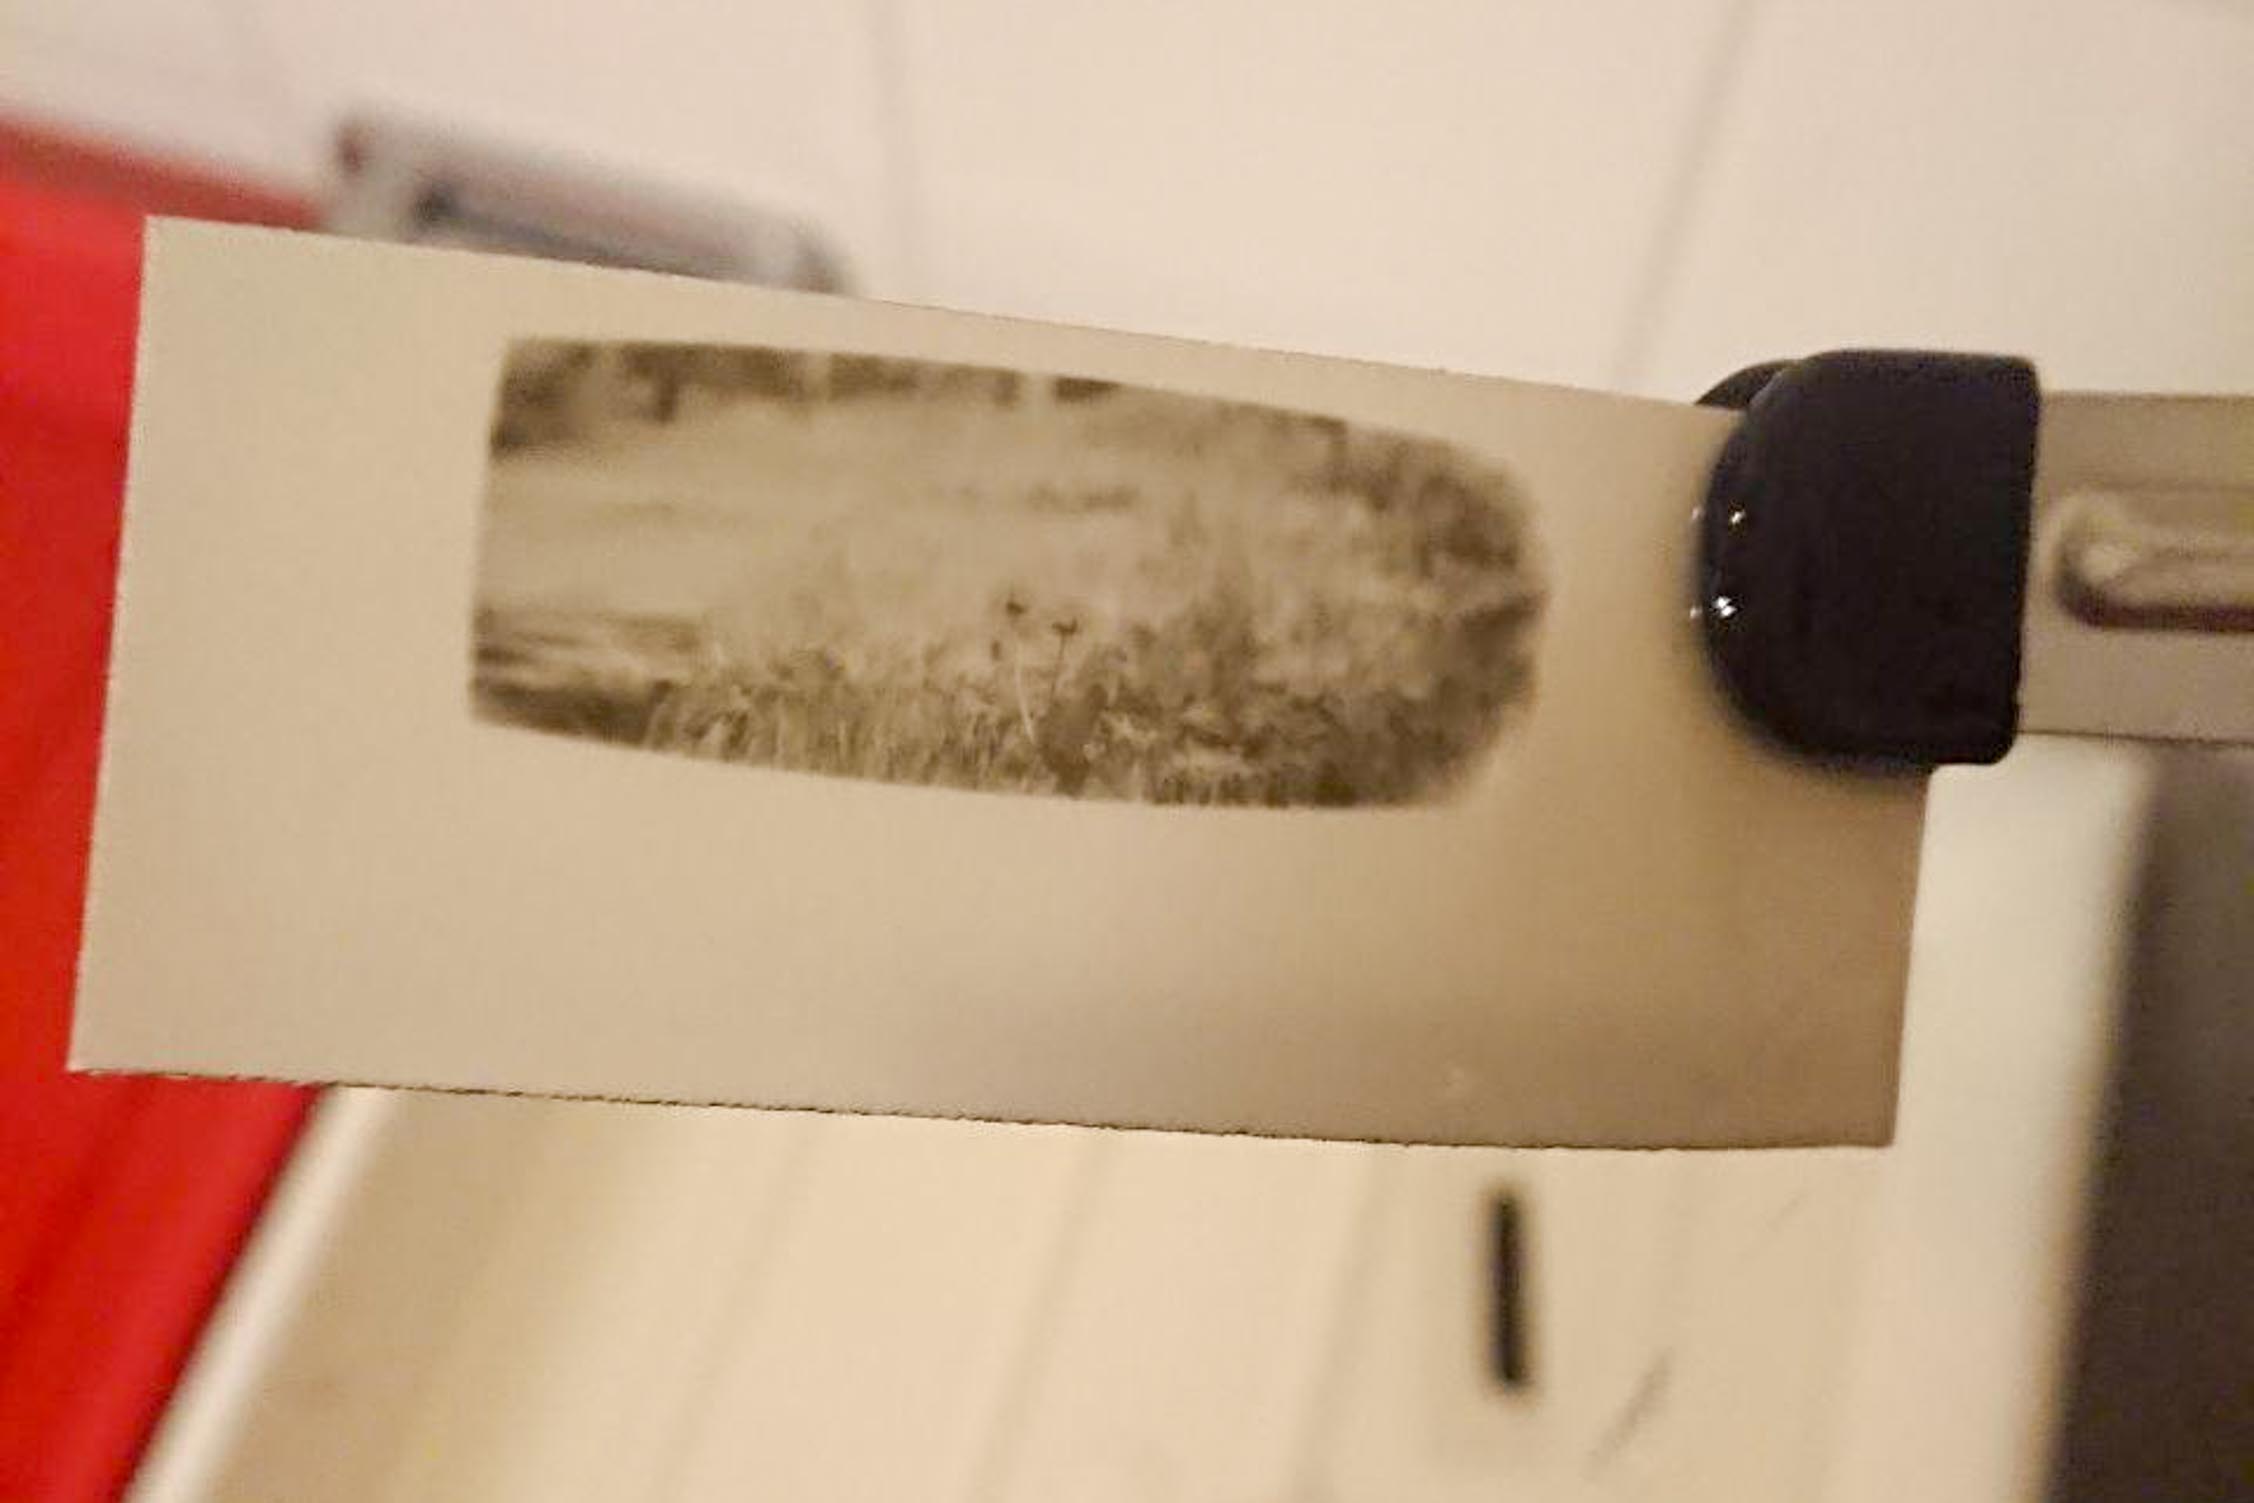
At approx. 27x9 mm, it’s the smallest print I’ve made so far.
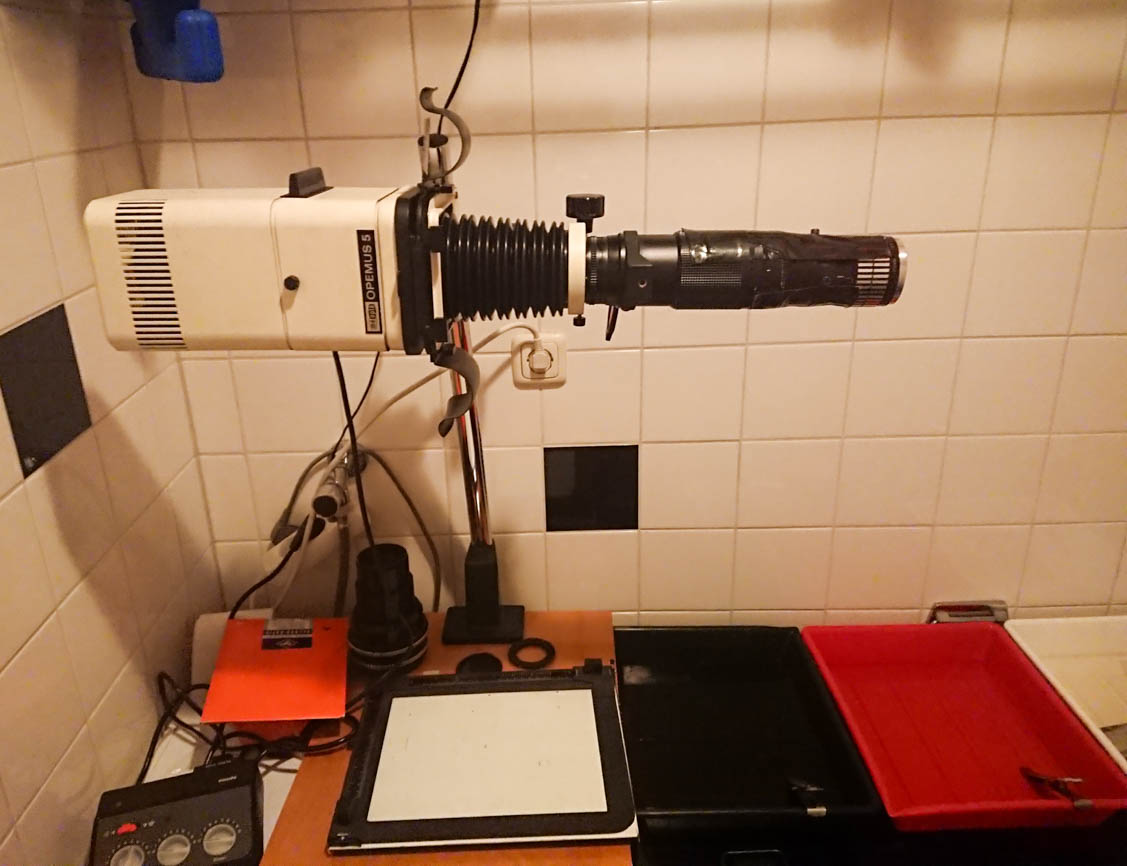
The macro lens is out then. So, now I need to project the picture at 1.5m distance. The enlarger I have thankfully allows for turning it to the side, for making huge enlargements. This way, I can project onto the wall instead. To not need an absolutely huge sheet of light-sensitive paper, I had to switch out the 100mm lens for a 300mm one- Where during photography that makes faraway objects bigger, it now serves to project the same negative smaller. Adding on the anamorphic lens using ducttape of course works just fine. Once everything is focused up, the projected image was 27x9, which is ideal for making two prints out of a sheet of 20x30 paper. The projected outlines were marked on the wall with some more tape, lights were turned off, and…
The final print is produced.
webready-.jpg)
Also check out the Droneclash 2019 Anamorphic music video!