Universal Marker Airbrush
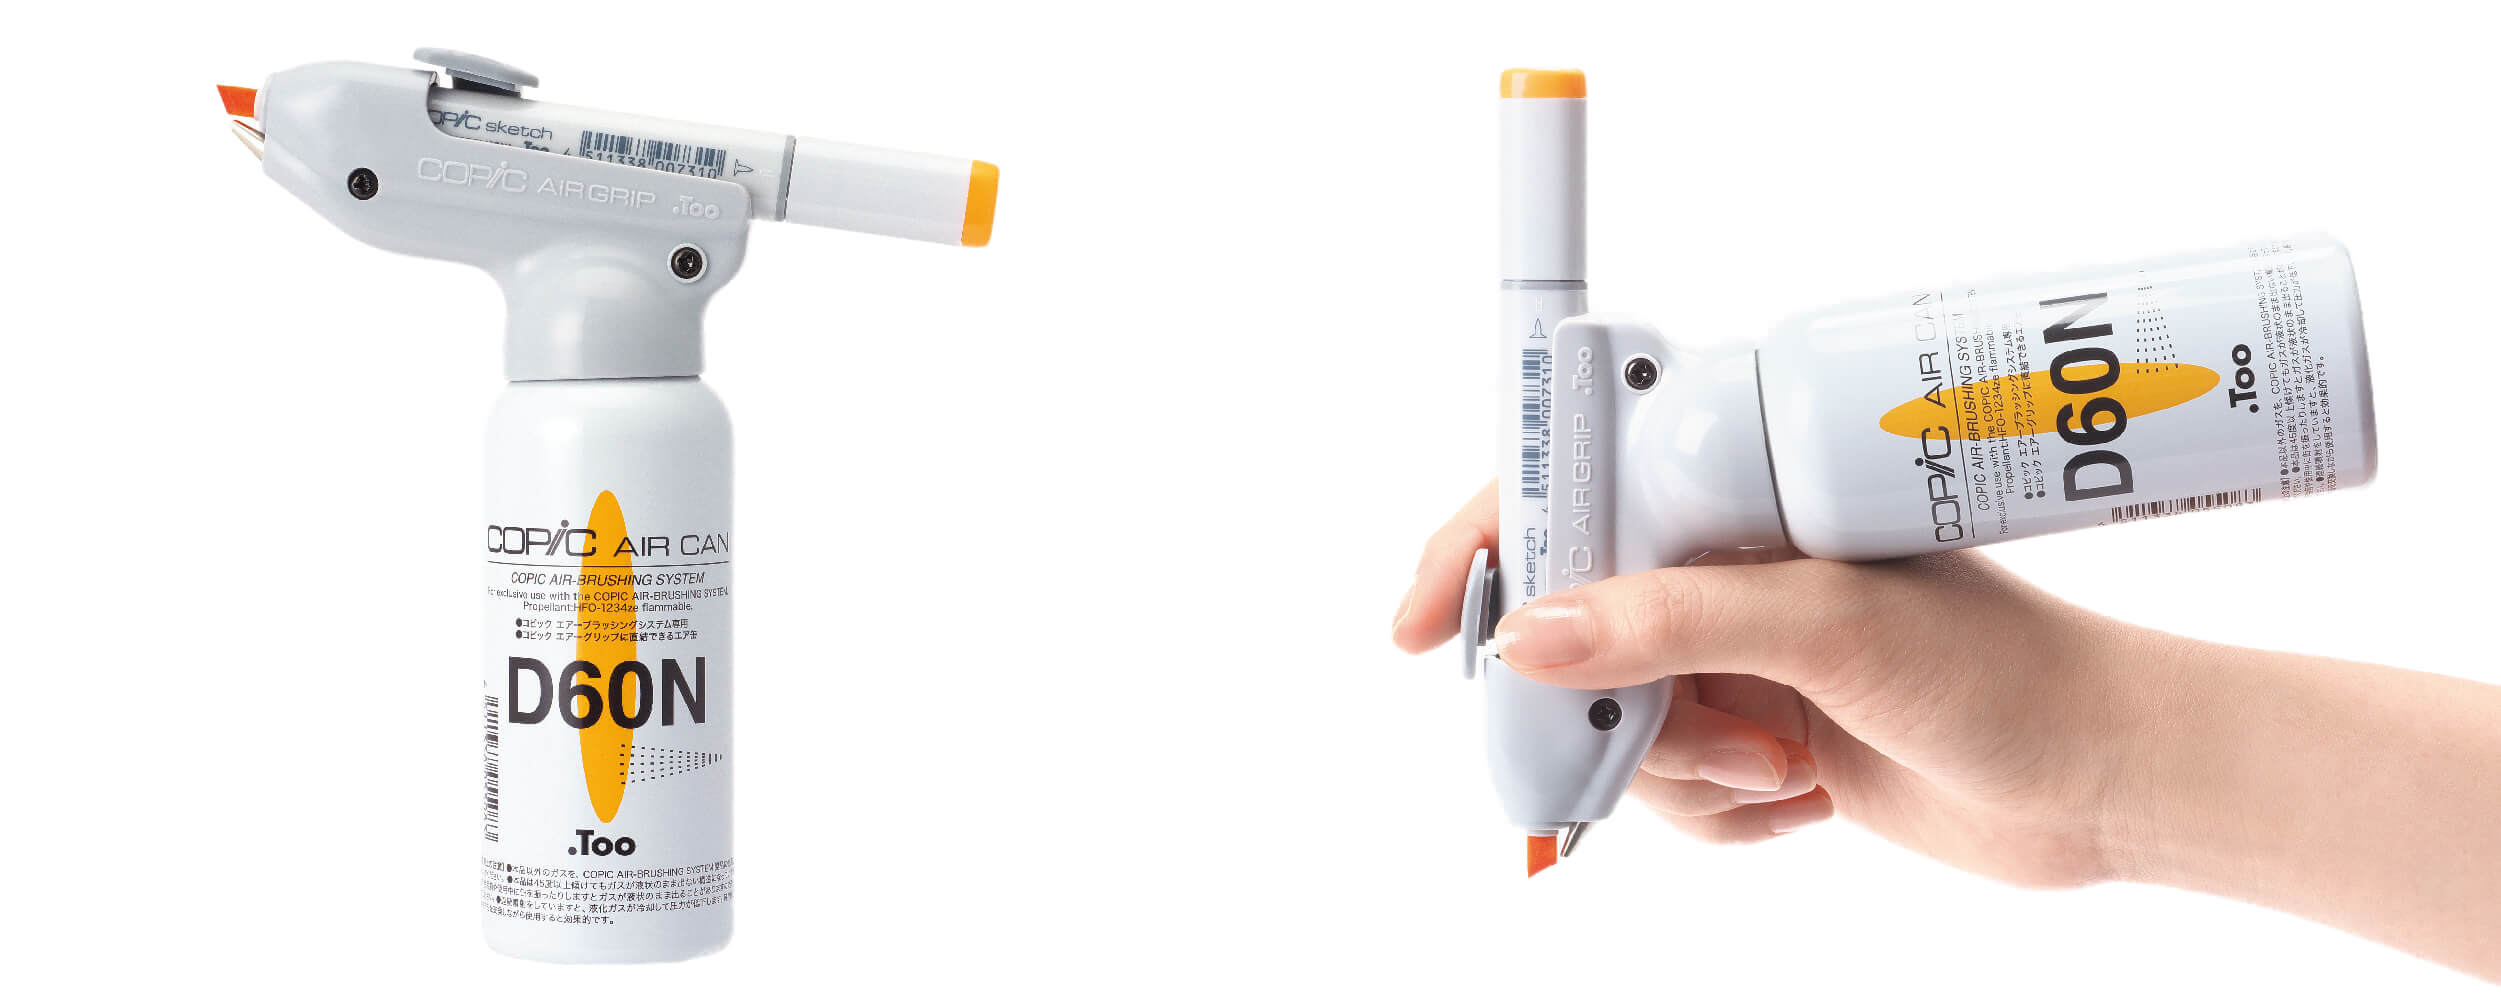
Above you see a really cool product made by Copic. For those that don’t know, Copic is one of the leading manufacturers of sketching markers. They work really well, and are basically the industry standard among industrial designers. The product above, converts any Copic marker you own into an airbrush! Neat.
However, there’s a few downsides to that design-
-It needs an airtank (bad for the environment, costly to replace)
-The unit costs 45 euro initially
-It’s quite bulky! Will you bring it wherever you go? Probably not..
-It may or may not work with different brands.
As a poor student, how to replicate these professional tools on a shoestring budget?
A good starting point is to ask “How does it all work?” The function is surprisingly similar to a conventional airbrush, where paint is introduced to the airstream through a small tube, and sucked along due to the Venturi effect. In this case, the paint tube is replaced by the capillary action of the marker’s fibers, so basically lots of small tubes. The trick then, is to blow the air along the tip at such an angle that a suction occurs along the fibers. After experimenting a bit, it seems that for this the ideal angle is approx. 30-45 degrees from the body of the marker. The stream needs to be high-pressure, but not necessarily high flow.
The first proof-of-concept was actually made by me all the way back in 2014.
It consisted of, quite literally, a broken pen, a cut-in-half flexible protractor triangle, and an (un)reasonable amount of ducttape.
The pen tube was used to blow through, and the tip of the pen was flattened off to alter the nozzle at the end. The two halves of the triangle (small 45-45-90 triangles themselves) were used as the structure, and supported a marker of choice at a 45deg angle from the pen. A loop of tape was used so that a marker could be slipped trough; no stickiness of the tape was needed. This worked remarkably well, but adjusting the marker to the exact correct position was a bit fiddly. Due to the lacking rigidity (why did I use a flexible protractor???) it also did not keep it’s position very well. However, as a small project, cool little tool to spice up sketches, and a proof of concept, it did it’s job. Sadly I was unable to find any pictures of it- but I’m sure it’s still around somewhere.
Skip forward three years to 2017.
By this time, I’d recently gotten a 3d-printer! As one of my first projects on that, I updated the flabby but functional design with something that had the following design goals-
-Very compact
-Works the first time, all the time
-Prints with minimal supports
-Somewhat ergonomic
-If possible, fits any markers
So. Off to Solidworks then.
Since the angle at which this works best wasn’t known to me, and the precise positioning of marker tips into the stream really matters, (half a millimeter less, and no ink comes out!) I ended up using “fast prototyping” concepts, and just printed variants until it worked perfectly, then finalized the ergonomics. I made about a dozen prototypes.
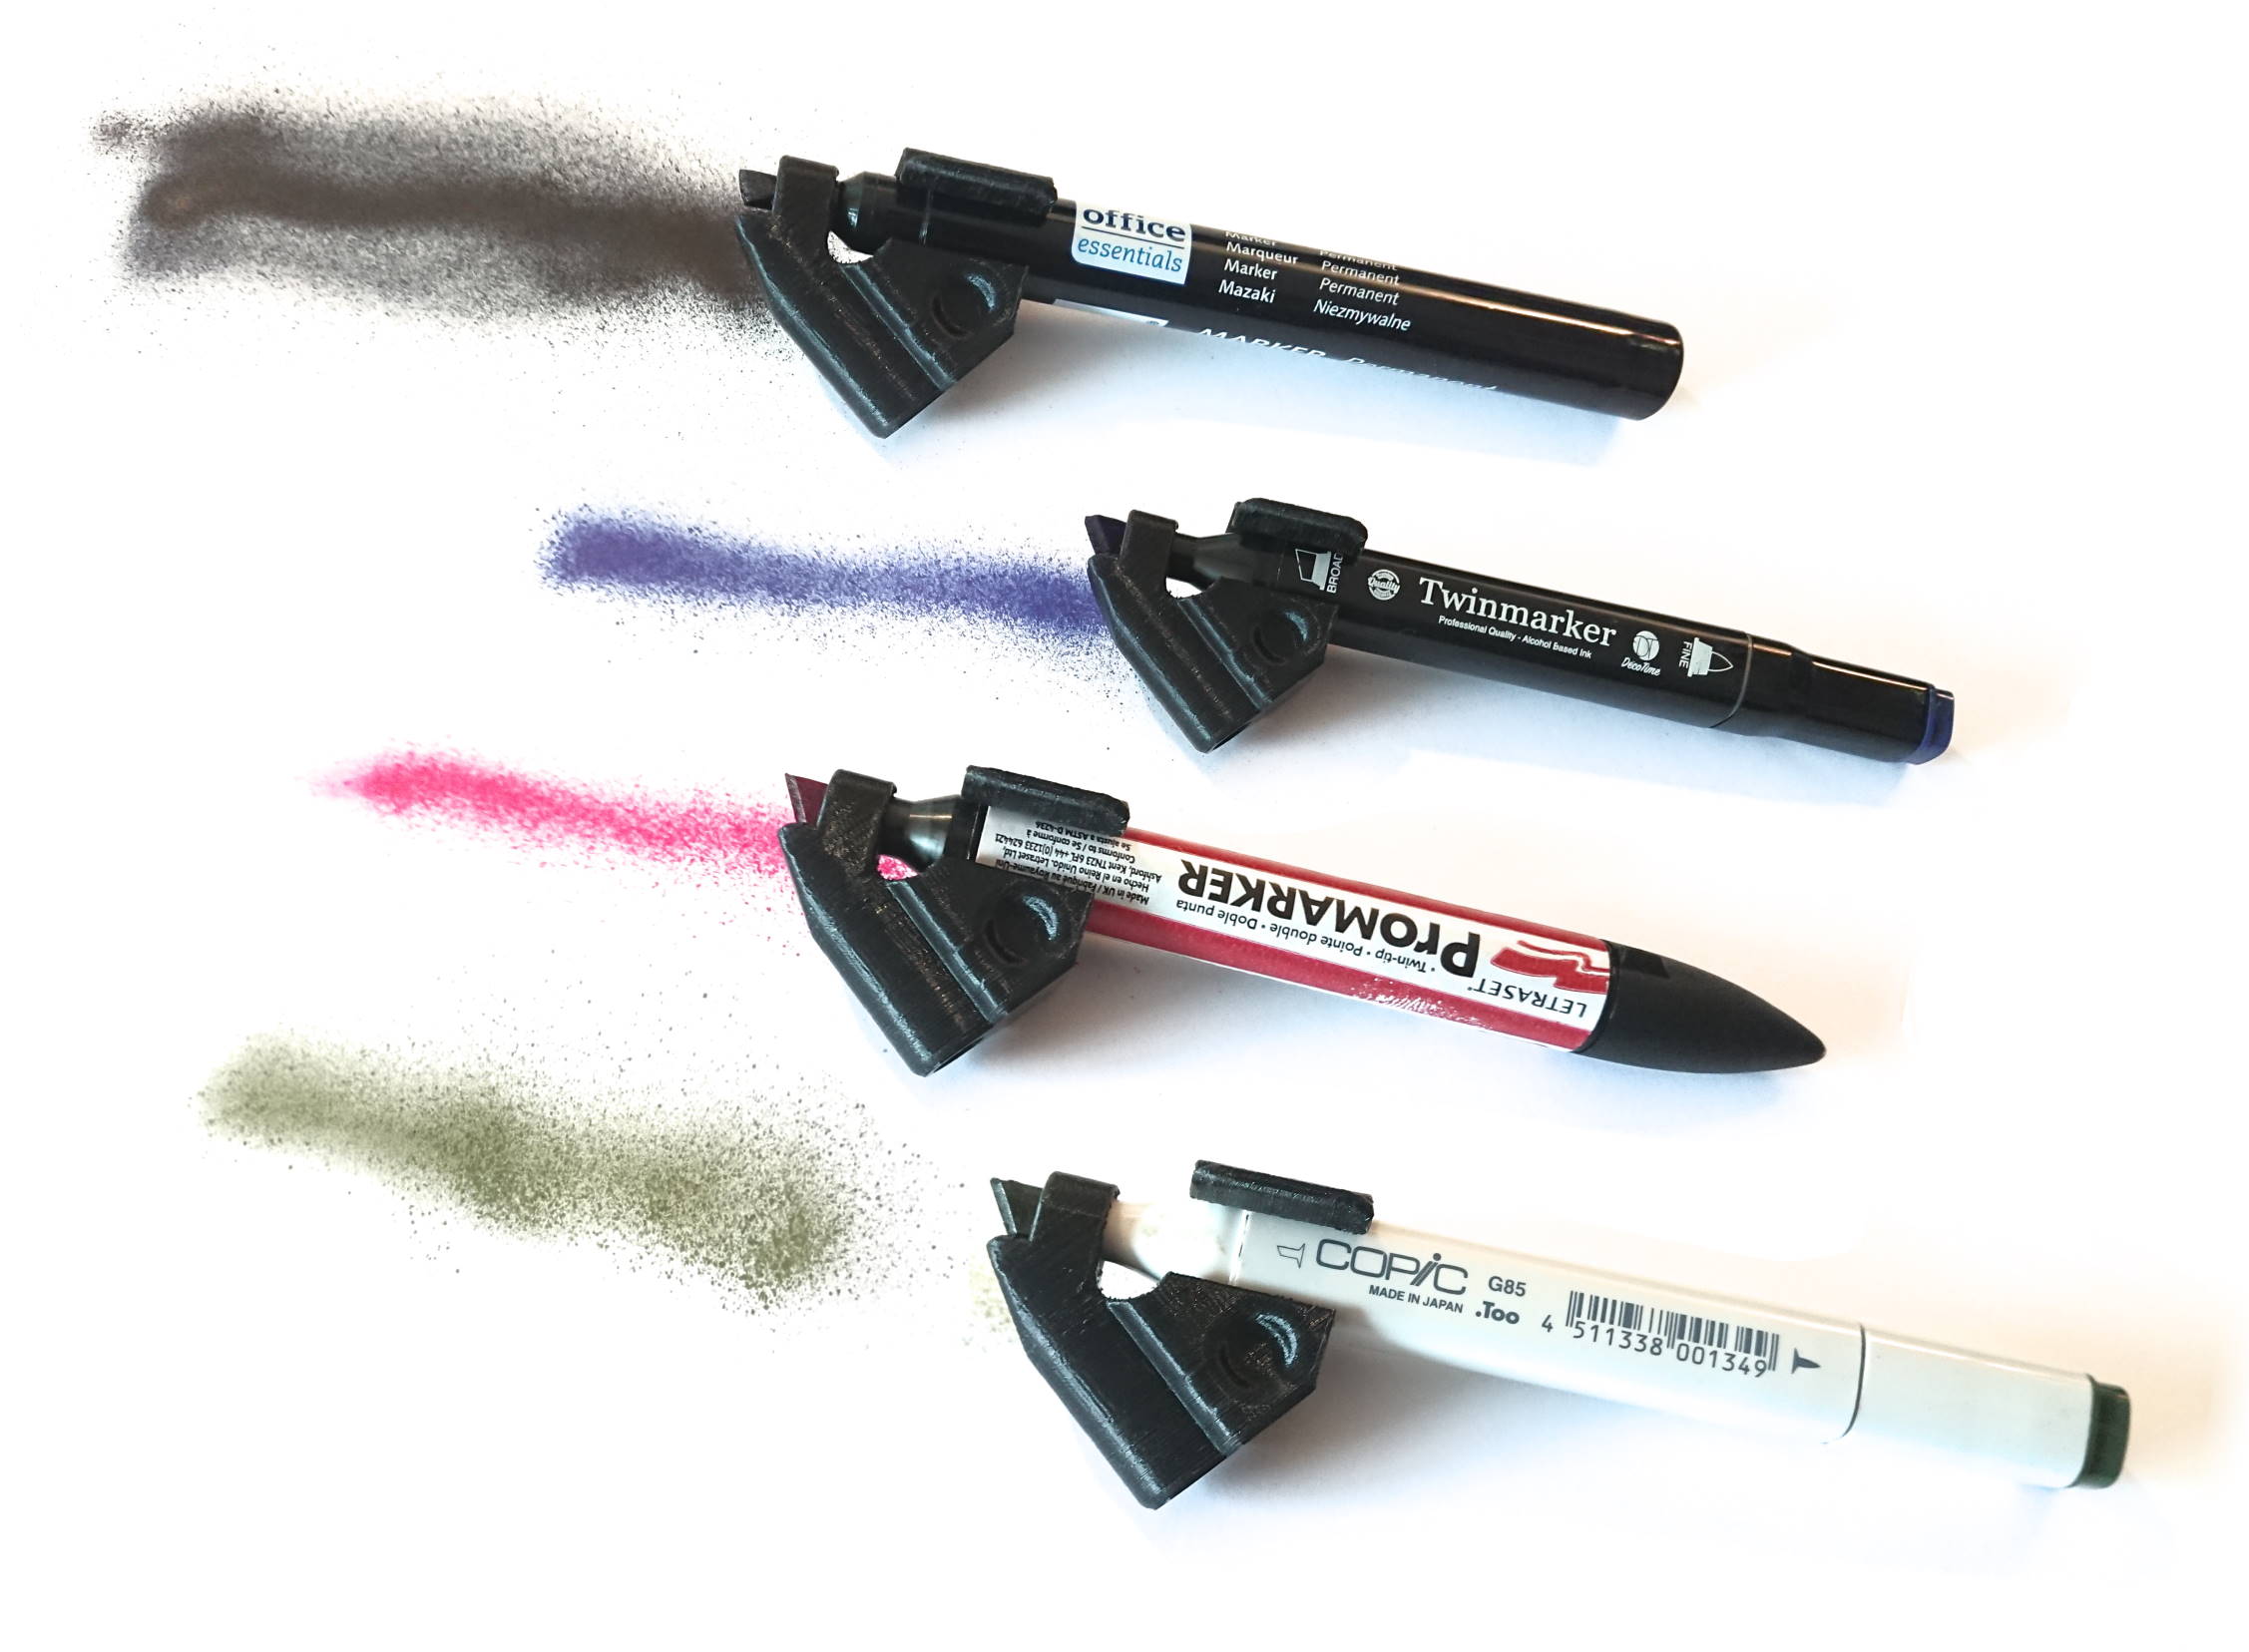
The end result is a small clip-based design, with a tube going trough the center. If you put just about any marker into it, the tip will line right up with the small hole, in such a way that it just works. The thickness of most markers is remarkably similar actually, so I had no issues using this design with the Copic markers, Twinmarkers (a knockoff brand), Promarkers, as well as general permanent markers, or whiteboard markers! It won’t play nice with fat textmarkers, or slim-bodied ones, but otherwise almost anything will fit and work.
-Very compact: at 40x40x27mm (largest outside dimensions) it's small enough to even fit two into a pencase.
-Works the first time, all the time: It does! With Copic and Promarkers, it's almost always in the correct position right away. Other markers may need to be adjusted slightly if they have a very long tip.
-Prints with minimal support: At 15% of material usage if using plenty supports, it's within the acceptable range for sure. Cleanup is also easy.
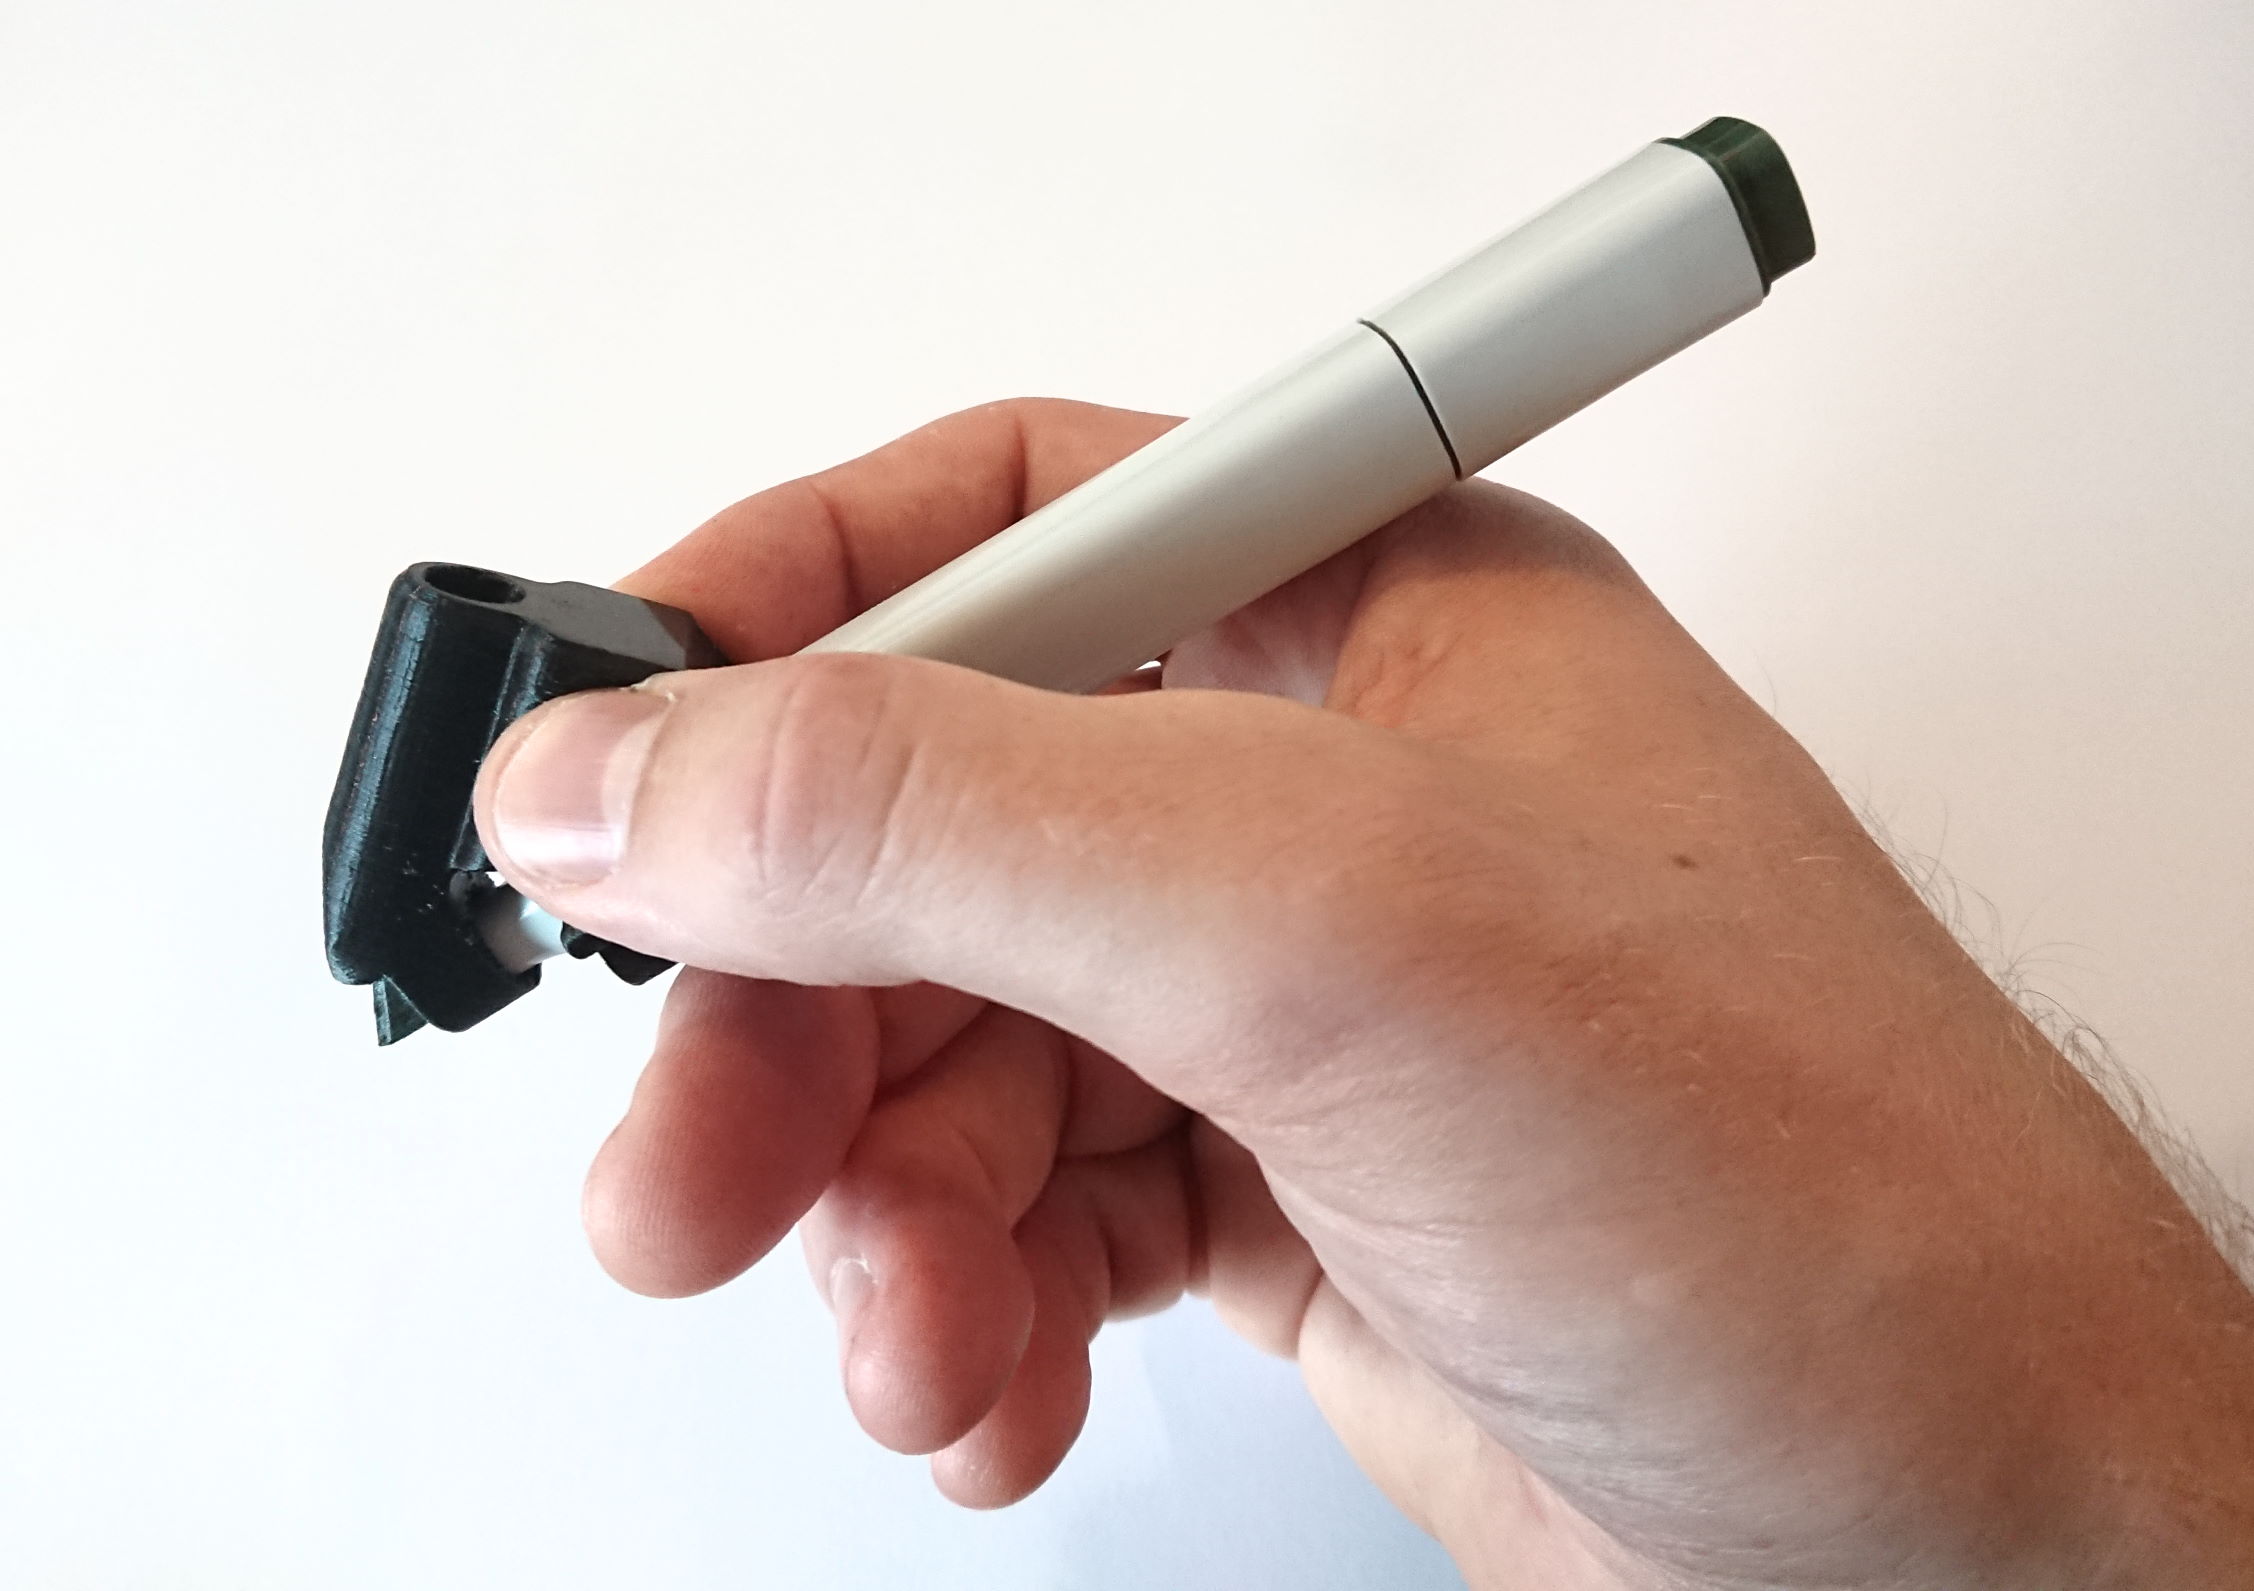
-Somewhat ergonomic: The two dimples at the side provide a good grip for the hand, and the marker can rest against the hand. The part where you have to blow trough it is a bit less ergonomic- that's a compromise because of the size. If used extensively, a flexible tube could be fitted to the rear.
-If possible, fits any markers: As discussed, it fits nearly all.
Also, did I mention yet how cheap it is? If you were to print a single one, you’d have a printing time of 40 minutes. However, that’s mainly due to layer cooling times- if you print five at once, the total print time is about three hours, so only 18 minutes per piece. Material costs, assuming 20 euro/kilogram, are 18 cents a piece, which makes them cheap and fast enough to print several of, and give away to anyone interested. Weight of the finished print is just a mere eight grams.
Do you want to print your own? The file is available on my Thingiverse.